After nearly six months of work, most of which was spent with roughed out lumber stacked in the basement while it finished drying, the trestle table was completed in time to host Thanksgiving dinner. You can read earlier entries in the build process here and here. Additionally, I suggest taking a look at this article from Woodworking Magazine. This table follows the design from that article fairly closely, with only a few changes to top and the feet.
Painting the Base
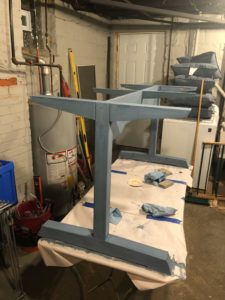
After assembling, gluing up, and truing up the base of the table, I applied three coats of Soldier Blue milk paint from the Old Fashioned Milk Paint Company. I find that milk paint adds color as well as texture and depth to a piece. Here, the paint was applied over the yellow pine base. While I don’t object to the stripey-ness of yellow pine finished with only a clear coat, there were several knots that were present in the table feet and stretcher. The paint did a good job covering those up.
Rather than applying paste wax as I had originally planed, I applied a few coats of danish oil over the base. This significantly deepened the blue color of the paint. It fits well with the colors in the dining room. In comparing the blue color from the photo above with the blue of the photo in the post, you can see just how much darker the blue becomes with the danish oil.
Finishing the Top
While the paint was drying on the base, I applied Tried and True Varnish Oil to the top. This was my first time working with a Tried and True product. The varnish oil has the consistency of honey. I applied it by wiping on a light coat and allowing it to penetrate the wood for about an hour. After an hour, the excess oil is wiped off and the table is buffed with a clean lint free cloth. The oil is then allowed to cure for twenty-four hours before applying each subsequent coat. A total of three coats were added here. In the future, I’ll plan on allowing more time for the final coat to cure.
Buttoning it Up
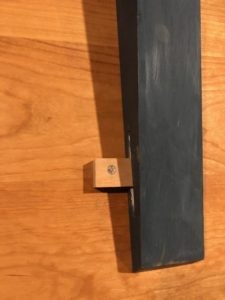
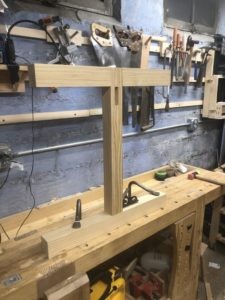
The top and base were then flipped over and placed on a workbench. After getting equal reveals around the base, the buttons were placed into the previously cut slots in the base and used to drill pilot holes into the table top. The buttons were then screwed in. These will allow the table top to expand and contract throughout the year while remaining firmly attached to the base. A total of six buttons, one on each side of each brace, were used.
The buttons were unscrewed to allow me to bring the top and base upstairs where they were then reattached. The table ended up over six and a half feet long and about 30 inches wide. Eight people can easily sit around the table with serving dishes in the middle.
All in all, this was a good build. I found working with the width and length of the table top to be a larger challenge than any of the joinery or shaping on the base. Jointing nearly seven foot boards with only a short-bed jointer required building jointing sleds for the planer. Even then, without a seven or eight foot workbench, sag in the sleds when leveling the boards with shims proved to be a constant battle. While biscuits were a great help for alignment, I expect that I’ll likely slow down and do one glue joint at a time in the the future to help the accuracy of the glue up. Similarly, for any future large table top, I expect I’ll take a different approach to finally flattening and try to rent time on a large drum sander rather than attacking it with a No. 7 plane and belt sander.
Even with all of the challenges in this build, I think the table came out well and we look forward to using it for decades to come. Now I just need build chairs to match to the table.
