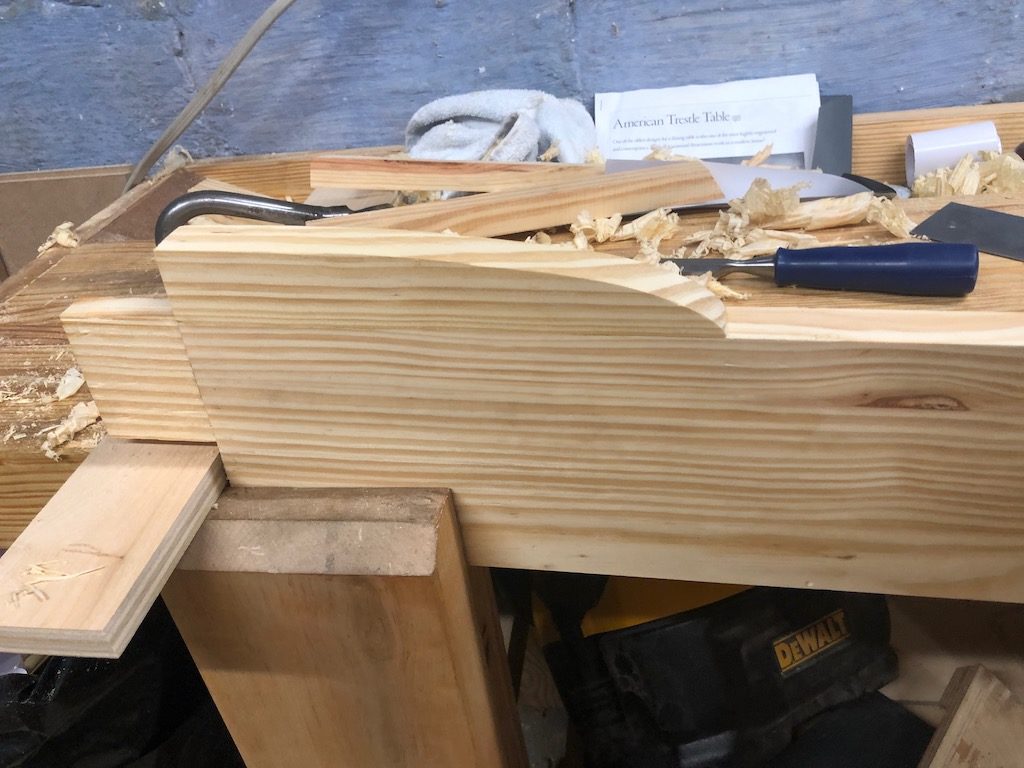
The stretcher tenons have been fitted and cut and the mid-brace has also been cut and fitted. The stretcher had already been face jointed and thicknessed when I ran the parts for the legs through the machinery. A quick check with a straight edge and winding sticks revealed no movement over the intervening few weeks.
The next step was to edge joint the strecher and rip it to width. While my powered jointer works well for shorter boards, this five foot board would be a bit of a challenge to get perfectly flat. That meant going to the workbench with my Union #7 jointer plane. I picked this plane up from eBay a few years ago and it has worked very well since then. There is definite pitting across the sole of the plane, but it has not affected the quality of cut or ability of the tool to function. A quick trip to the sharpening stones and then I look some wonderful shavings, getting a nice clean, flat cut across the full length of the edge. With one edge jointed, I then ripped to width on the table saw.

The next step was to lay out the tenons. Once laid out, I decided to try a couple of different ways to cut them. I cut the first tenon cheek with hand saws. Cutting the shoulder fairly easy. However, ripping down the face of the tenon cheek was a bit too difficulty. The tenon is 3 inches deep and 2.5 inches wide, so it was a bit too much to cut I cut the first tenon cheek using hand saws. I ended up straying from the line. After paring the tenon with a chisel, I moved to the table saw for all other tenons.
This post has been delayed a few times. Since I started it, I’ve moved to final glue up for the base.
The table top was glued up. When squaring it all up, I had some gnarly blow out from the router. It tore about a nine inch long piece off one edge. I was able to glue the piece back on, but eventually had to scab a small patch onto the edge. I decided to add breadboard ends. This is the first time that I’ve made breadboard ends. I started by cutting one long tenon on each end of the tabletop using a router, a clamped straight edge, and a straight bit. I then milled a groove into the edge of the breadboard using the dado stack on the table saw. The throat plate on jobsite table saws has some flex, so I cleaned it up with a plow plane to ensure that it was the same depth along the full length. I then marked out and cut three individual tenons into the ends of the tops, leaving a haunch that is as wide as the groove is deep. The breadboards were then placed on to the tenons so that I could mark the extends of the mortises. This was mortised by hand. Once everything seated acceptably, I marked locations for peg holes. These were drilled out on the drill press. The breadboard was then put back into place to transfer the locations of the holes. The holes in the outside tenons were drilled out and made oblong to allow for wood movement. Hide glue was used only for the center tenon on each end.
All that is left is to clean up the top, cut the buttons, and finish it all. We’ve decided on a Soldier Blue milk paint for the base. After a few coats of milk paint, I’ll top it with paste wax. The cherry top will receive Tried and True Varnish Oil. More photos to come later.